
41A5034 Safety Sensor Kit, Replacement for Craftsman/Chamberlain/Liftmaster Garage Door Sensor, Compatible with Liftmaster/Chamberlain/Craft
- Universal Compatibility: Replacement for craftsman/Chamberlain/Liftmaster garage door sensor, Compatible with all garage door openers manufactured by Liftmaster/Sears/Chamberlain/Craftsman after 1997, Incompatible with M
- Easy to Install and Program: 41a5034 Garage Door Opener Safety Beam Kit with Brackets can replace: 820CB , G801CB-P, 2610459, 012381050345, 041A5034, 801CB, 41A5266-1, 041-0136. A detailed user manual is included to help
- Updated Design: 041A5034 Safety sensor emits an invisible beam of light on the inside of the garage door, whenever there is an obstacle, the garage door automatically reverses before causing any damage to prevent acciden
- Package Includes: Detailed installation instructions*1, Sending sensor *1(with an amber LED), Receiving sensor *1 (with a green LED), Wire connectors *7, Wingnut *3 and 1/4-20" round head bolt *3.
- high quality After-sales Service: Our products provide a one-year warranty service, no matter for any reason you are not satisfied, please write to us, we will provide you with timely service. Note: Accessories are compa

Garage Door Sensor Beam Eyes, Garage Door Safety Sensor Replacement Parts Compatible with Liftmaster/Sears/Craftsman After 1997 (41A5034, 80
- Notice!!! The distance between the lenses of the two products should not exceed 15m!!! If the product does not work after installation, please troubleshooting by referring to the product details page.!!!
- Fit for Liftmaster Sears Craftsman (1997+) garage door openers with safety sensor. Replacement aftermarket parts for safety sensors 41A5034 & 41A5266-1, automatically opens the door if there is an obstruction.
- Your garage opener must be equipped with safety sensors!!!!! If not, installing this accessory will not add the feature. The length of the wire is 50cm, If your connection is far from the door, you need to equip with an
- 1 Door Kit - Includes Safety sensors*2 (with attached wires), Wire connectors *4, Wingnut *2 and 1/4-20" round head bolt *2 & Installation Instructions*1.
- The installation is quite simple, follow the instructions to operate, you can complete in a few minutes. Feel free to contact us anytime if you have any questions.

41A5034 Safety Sensor Kit with Bracket Replacement for Liftmaster Chamberlain Craftsman Garage Door Sensors, Sensor Beam Eyes Fit for Liftma
- Universal Compatibility - 41A5034 Garage door sensor Works with ALL Liftmaster, Chamberlain, Sears, Craftsman garage door openers manufactured AFTER 1997; Direct replacement for G801CB-P, 261045, 41A5034-1, and other com
- 2026 Upgraded Version Sensing Response Speed - Working principle of the garage door replacement sensor is to stop closing the garage door after sensing an object. Therefore, the sensing speed of the sensor will become ve
- When do you need to replace our sensors - original sensor is damaged and no longer works, the sensing speed of the sensor slows down, the sensing performance of the sensor deteriorates after being stimulated by sunlight,
- Quick and tool free installation - The package comes with a detailed instruction manual. You can quickly complete the replacement according to the manual and accompanying accessories. Please note: During installation, pl
- BNRSZ brand plug and play garage door safety sensor will be continuously updated and upgraded - We will collect the reasons for user malfunctions and actual usage situations. Timely update and improve our garage door pho
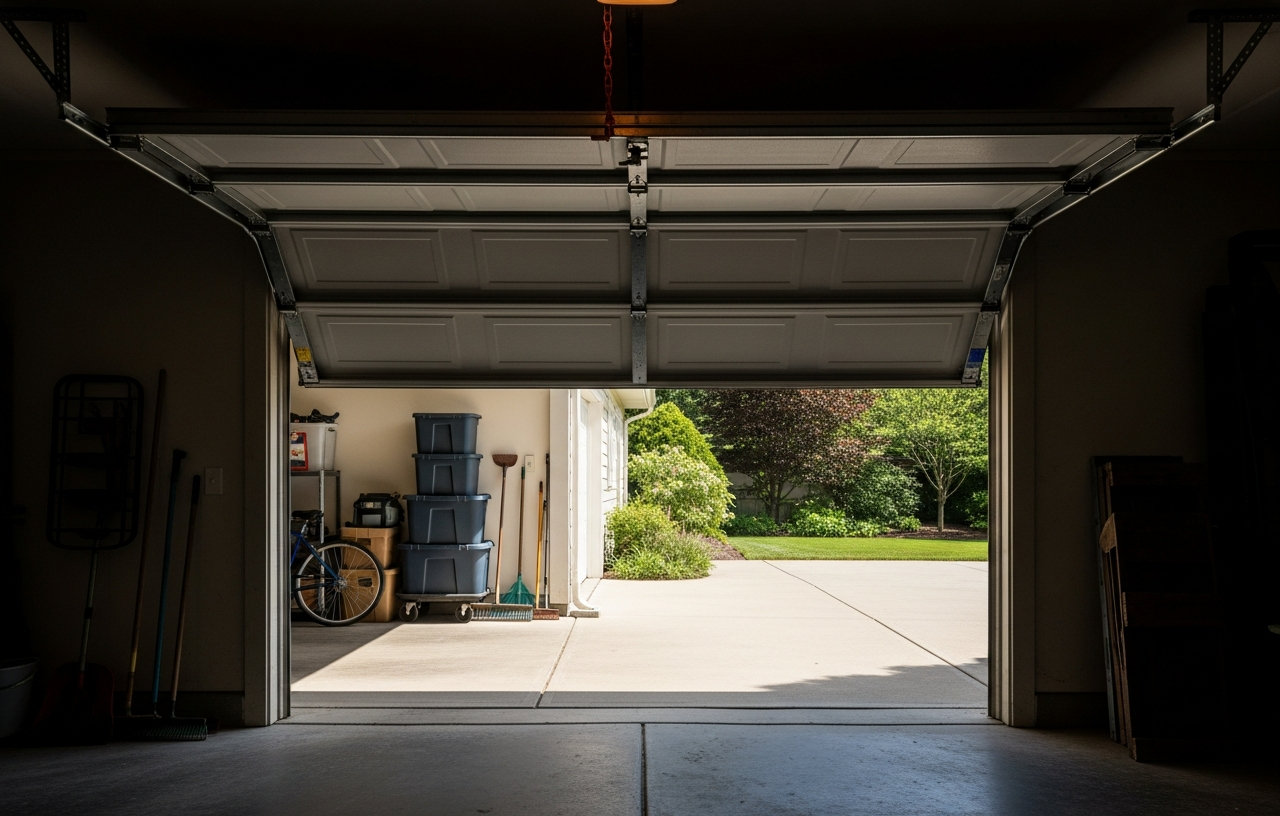
A garage door that pauses mid-descent, or reverses completely without warning, usually signals an issue with its safety sensors. These small, often overlooked components are crucial for preventing accidents, projecting an invisible beam across the door's opening. If this beam is interrupted, or if the sensors themselves malfunction, your garage door opener will prevent the door from closing fully.
Most garage door sensor problems are surprisingly simple to resolve, often requiring just a few minutes of your time and no special tools. Understanding the common causes and working through the fixes methodically can save you the cost of a professional service call. We will cover everything from obstructed beams to wiring faults and component replacement, offering realistic cost estimates for each repair.
Common Reasons Your Garage Door Sensor Isn't Working
Before diving into specific fixes, it helps to understand why your garage door sensors might be acting up. Most issues fall into a few key categories:
- Misalignment: The most frequent culprit. If the two sensors, one transmitting and one receiving, are not perfectly aimed at each other, the beam breaks, and the door won't close.
- Obstructions: Anything blocking the invisible beam, even a small leaf, spiderweb, or piece of debris, will trigger the safety reversal.
- Dirty Lenses: Dust, dirt, and grime can obscure the sensor lenses, weakening the beam and causing intermittent failures.
- Loose or Damaged Wiring: The wires connecting the sensors to the garage door opener can become loose at the terminals, or get nicked, frayed, or chewed by pests.
- Direct Sunlight Interference: Strong, direct sunlight shining into the receiving sensor can sometimes mimic an obstruction, confusing the sensor.
- Faulty Sensors: Less common, but sensors can simply fail due to age, impact, or manufacturing defects.
Addressing these common garage door sensor problems typically starts with visual inspection and simple adjustments.
Safety First: Before You Begin Troubleshooting
Always prioritize safety when working with your garage door. The spring system is under extreme tension, and the opener itself has powerful moving parts. While troubleshooting sensors is generally low-risk, it is wise to:
- Disconnect power to the garage door opener before making any adjustments or repairs to wiring. Pull the emergency release cord only if you need to manually operate the door, and be aware of its weight.
- Wear safety glasses to protect your eyes from any unexpected debris.
- Avoid working on the door when children or pets are nearby.
Step 1: Check for Obstructions (Free)
The easiest and cheapest fix for a garage door sensor issue is often a simple obstruction. A tiny object can block the beam, so check thoroughly.
- Examine the Path: Look between the two sensors, usually located 4-6 inches above the garage floor on either side of the door opening.
- Clear Debris: Remove any leaves, dirt, toys, tools, or anything else that might be in the beam's path. Pay close attention to spiderwebs, which can be surprisingly effective at blocking the beam.
- Test the Door: Once clear, try closing the door again. If it works, you have found your solution.
Step 2: Clean the Sensor Lenses (Free)
Dust and grime buildup on the sensor lenses can weaken the beam, causing intermittent garage door sensor problems. This is a common oversight when troubleshooting garage door sensors.
- Locate Sensors: Find the two safety sensors on either side of your garage door opening.
- Wipe Lenses: Use a soft, clean cloth (like a microfiber cloth) to gently wipe the lenses of both the transmitting and receiving sensors. Avoid harsh cleaners, which could scratch the plastic.
- Test the Door: Attempt to close the door. If the problem persists, move to alignment.
Step 3: Align the Garage Door Sensors (Free)
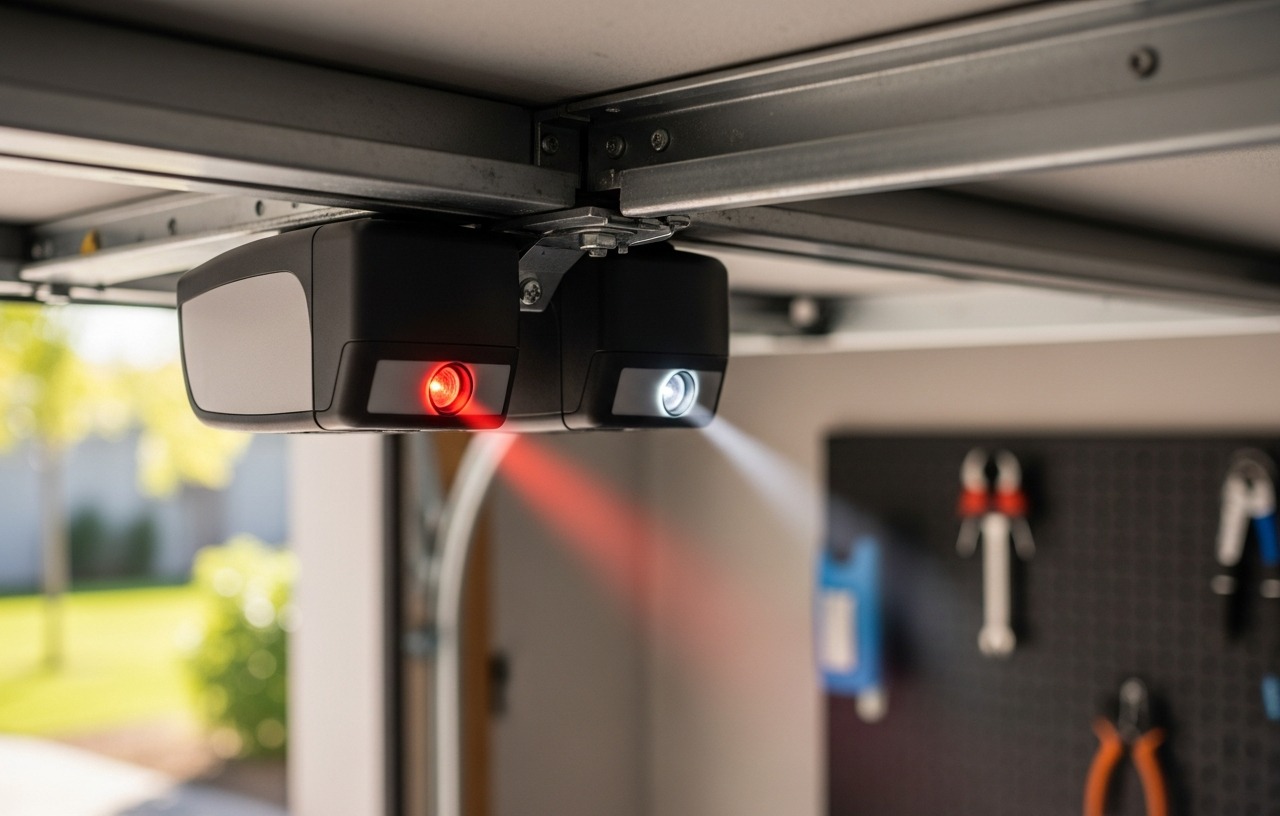
Misalignment is the most common reason for a garage door sensor not working. The sensors need to point directly at each other for the beam to connect. Look for the indicator lights on your sensors. One sensor (the sending unit) typically has a steady light, while the other (the receiving unit) has a light that indicates alignment. If the receiving sensor's light is off, blinking, or dim, it is misaligned.
How to Realign Your Sensors:
- Identify Sensor Lights: Observe the small LED lights on both sensors. One light should be steadily lit, indicating power and that it is transmitting. The other light (on the receiving sensor) should also be steadily lit when properly aligned. If this light is off or blinking, adjustment is needed.
- Loosen Wing Nuts/Screws: Most sensors are attached to brackets with wing nuts or screws. Loosen these just enough to allow you to pivot the sensor by hand.
- Adjust Slowly: Gently move the receiving sensor (the one with the blinking or off light) in small increments, aiming it towards the transmitting sensor. Watch the indicator light carefully.
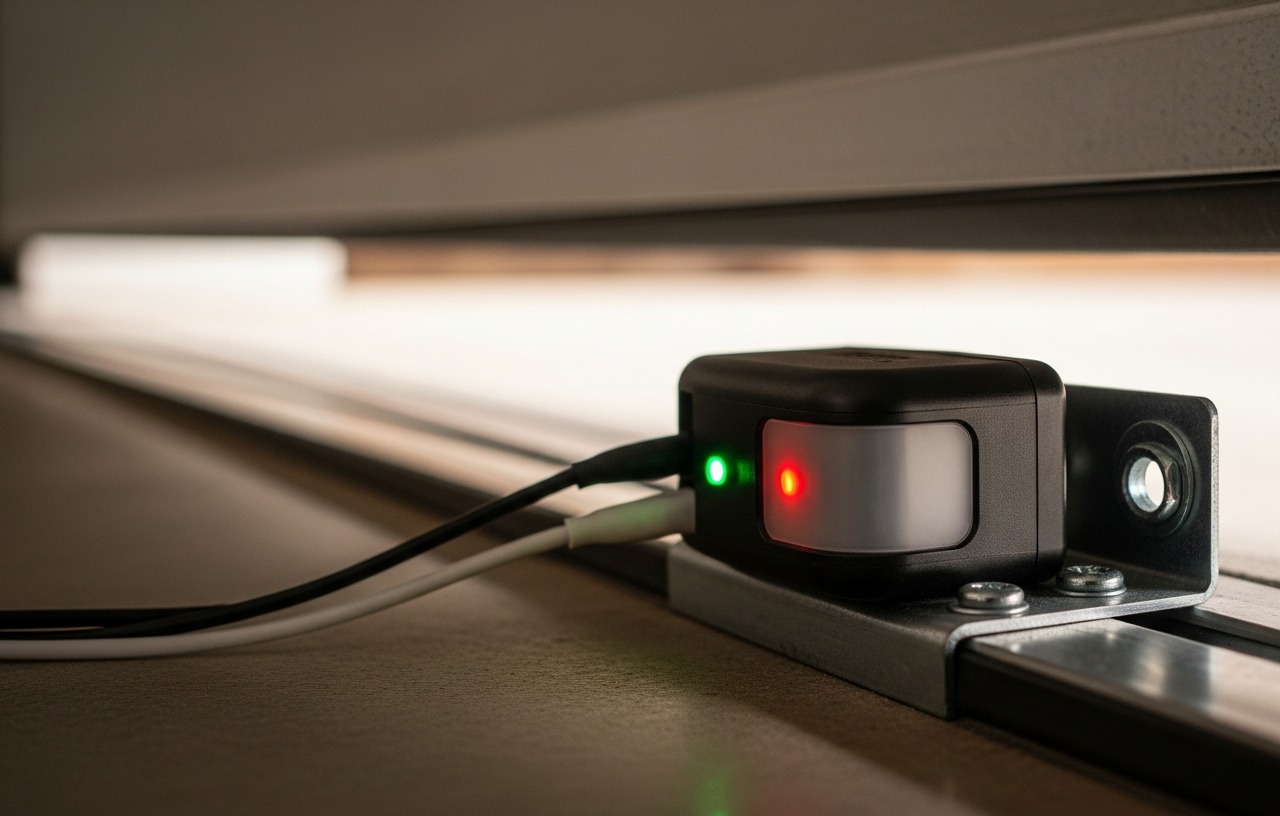
- Achieve Steady Light: Stop adjusting when the receiving sensor's light turns solid green or amber, indicating a successful connection.
- Tighten Fasteners: Once the light is solid, carefully tighten the wing nuts or screws to secure the sensor in place. Be careful not to shift the sensor during this step.
- Repeat for Other Sensor (if necessary): While usually only one needs adjustment, ensure both are firmly in place and their lights are solid.
- Test the Door: Try closing your garage door. If it works, you have successfully realigned your sensors.
Sometimes, direct sunlight can interfere with the sensor beam, especially in the late afternoon. If your sensors seem to work fine at other times but fail at a specific time of day, consider adding a small shade or baffle around the receiving sensor to block direct sun. This can be as simple as a piece of cardboard or plastic.
Step 4: Inspect and Repair Wiring (Cost: $0-$15 for connectors/wire)
Loose or damaged wiring is a common cause of a garage door sensor issue. The wires can get jostled, pulled, or even chewed by rodents.
- Disconnect Power: Unplug your garage door opener from the electrical outlet. This is a critical safety step when dealing with wiring.
- Check Terminal Connections: Go to your garage door opener motor unit (usually mounted on the ceiling). Locate the terminal block where the sensor wires connect. These are typically low-voltage wires, often red/white or white/black. Ensure they are securely inserted and not loose. Gently tug on them to confirm.
- Inspect the Full Wire Run: Follow the sensor wires from the opener unit all the way down to each sensor. Look for any visible damage: nicks, fraying, exposed copper, or crimping. Pay close attention to areas where the wire might rub against the door frame or other components.
- Repair Damaged Sections: If you find a damaged section, you can often repair it. Cut out the damaged portion, strip about half an inch of insulation from each end, and use wire nuts or crimp connectors to splice in a new piece of 18-22 gauge bell wire. Ensure connections are tight and secure.
- Secure Wires: Use insulated staples or zip ties to secure the wires along the wall, preventing them from being snagged or damaged again.
- Restore Power and Test: Plug the opener back in and test the garage door.
“A lot of homeowners overlook wiring issues,” says Mark Jenkins, a lead technician at Apex Garage Solutions in Dallas, Texas. “It is a simple fix that costs almost nothing if you have some basic wire connectors. Just make sure the power is off before you touch anything.”
Step 5: Address Direct Sunlight Interference (Cost: $0-$5 for DIY shade)
Sometimes, what seems like a faulty sensor is actually strong direct sunlight hitting the receiving sensor, overwhelming its ability to detect the infrared beam from the transmitting sensor. This often causes garage door sensors not lighting up or blinking only at certain times of the day.
- Observe Timing: Notice if the sensor issue primarily occurs during a specific part of the day, especially when the sun is low in the sky and shining directly into the garage opening.
- Create a Shade: Fashion a small shade or baffle out of cardboard, plastic, or even aluminum foil. This shield should be placed around the receiving sensor to block direct sunlight without obstructing the sensor's view of the transmitting sensor.
- Mount Securely: Attach the shade to the sensor bracket or the wall using tape, screws, or zip ties.
- Test: Wait for the problematic time of day and test the garage door.
Step 6: Replace Faulty Sensors (Cost: $30-$60 for parts)
If you have gone through all the previous steps and your garage door sensor is still not working, it is possible one or both sensors are faulty. This is where replacing the components comes in.
Signs of truly faulty sensors include:
- The indicator lights never come on, even with power and good wiring.
- The sensors are physically damaged (cracked, bent, or waterlogged).
- You have confirmed alignment and clear path, but the receiving sensor light remains off or blinks erratically.
Most modern garage door openers use universal safety sensors. For instance, the 41A5034 Safety Sensor Kit is a TOP PICK replacement for Craftsman, Chamberlain, and Liftmaster garage door sensors, compatible with openers manufactured after 1997. It is designed for easy installation and comes with brackets and a detailed user manual.
Other good options include the Garage Door Sensor Beam Eyes or the 41A5034 Safety Sensor Kit with Bracket, both offering universal compatibility for popular brands.
How to Replace Garage Door Sensors:
- Disconnect Power: Always unplug the garage door opener first.
- Remove Old Sensors: Loosen the wing nuts or screws holding the old sensors to their brackets. Disconnect the wires from the sensor terminals.
- Install New Sensors: Attach the new sensors to the existing brackets. If your new kit comes with brackets, you may choose to use those instead, ensuring they are mounted at the correct height (4-6 inches from the floor).
- Connect Wiring: Carefully connect the wires to the new sensor terminals. Pay attention to polarity (usually indicated by different colored wires or markings on the sensor).
- Align New Sensors: Just like in Step 3, align the new sensors until the indicator light on the receiving sensor is solid.
- Secure and Test: Tighten all fasteners, restore power to the opener, and test the door's operation.
Sensor kits typically cost between $30 and $60 in 2026. This is a DIY-friendly repair that many homeowners can manage.
When to Call a Professional for Garage Door Sensor Not Working
While many garage door sensor issues are DIY-friendly, there are times when calling a professional is the best course of action. This might include:
- Complex Wiring Issues: If you suspect extensive wiring damage within the wall or leading to the opener unit itself, or if you are uncomfortable working with electrical connections.
- Persistent Problems: If you have tried all troubleshooting steps, replaced the sensors, and the problem persists, it could indicate a deeper issue with the garage door opener's logic board or motor.
- Physical Damage to Opener: If the opener unit itself seems damaged or malfunctioning, a professional can diagnose it. You might find more troubleshooting tips for general opener issues in our guide on Garage Door Won't Open? 8 Causes and How to Fix Each One.
- Lack of Confidence: If you are simply uncomfortable performing the repairs yourself, a professional can ensure the job is done safely and correctly.
A service call for a garage door technician typically costs between $80 and $150 in 2026, which usually includes the diagnosis. If parts are needed, expect to pay extra for sensors (similar to the DIY cost) plus labor, which could add $50-$100 to the total. For example, a professional sensor replacement might cost $150-$250 total.
“Sometimes, what looks like a sensor problem is actually a symptom of a larger issue with the opener,” explains Patricia Webb, owner of Guardian Door Services in Phoenix, Arizona. “If you have checked alignment, cleaned the lenses, and verified the wiring, and it still isn't working, it is time to have a pro look at it. We can quickly rule out the simple stuff and pinpoint if it is the logic board or another component.”
Maintaining Your Garage Door Sensors
Preventing future garage door sensor problems is easier than fixing them. A few simple maintenance tips can keep your sensors working reliably:
- Regular Cleaning: Once every few months, give the sensor lenses a quick wipe down with a soft cloth.
- Check Alignment: Periodically check the indicator lights on your sensors to ensure they are still steadily lit.
Our Recommendation🏆 TOP PICK
41A5034 Safety Sensor Kit, Replacement for Craftsman/Chamberlain/Liftmaster Garage Door Sensor, Compatible with Liftmaster/Chamberlain/Craft
Check Price on Amazon- Universal Compatibility: Replacement for craftsman/Chamberlain/Liftmaster garage door sensor, Compatible with all garage door openers manufactured by Liftmaster/Sears/Chamberlain/Craftsman after 1997, Incompatible with M
- Easy to Install and Program: 41a5034 Garage Door Opener Safety Beam Kit with Brackets can replace: 820CB , G801CB-P, 2610459, 012381050345, 041A5034, 801CB, 41A5266-1, 041-0136. A detailed user manual is included to help
- Updated Design: 041A5034 Safety sensor emits an invisible beam of light on the inside of the garage door, whenever there is an obstacle, the garage door automatically reverses before causing any damage to prevent acciden
- Package Includes: Detailed installation instructions*1, Sending sensor *1(with an amber LED), Receiving sensor *1 (with a green LED), Wire connectors *7, Wingnut *3 and 1/4-20" round head bolt *3.
- high quality After-sales Service: Our products provide a one-year warranty service, no matter for any reason you are not satisfied, please write to us, we will provide you with timely service. Note: Accessories are compa
Garage Door Sensor Beam Eyes, Garage Door Safety Sensor Replacement Parts Compatible with Liftmaster/Sears/Craftsman After 1997 (41A5034, 80
Check Price on Amazon- Notice!!! The distance between the lenses of the two products should not exceed 15m!!! If the product does not work after installation, please troubleshooting by referring to the product details page.!!!
- Fit for Liftmaster Sears Craftsman (1997+) garage door openers with safety sensor. Replacement aftermarket parts for safety sensors 41A5034 & 41A5266-1, automatically opens the door if there is an obstruction.
- Your garage opener must be equipped with safety sensors!!!!! If not, installing this accessory will not add the feature. The length of the wire is 50cm, If your connection is far from the door, you need to equip with an
- 1 Door Kit - Includes Safety sensors*2 (with attached wires), Wire connectors *4, Wingnut *2 and 1/4-20" round head bolt *2 & Installation Instructions*1.
- The installation is quite simple, follow the instructions to operate, you can complete in a few minutes. Feel free to contact us anytime if you have any questions.
41A5034 Safety Sensor Kit with Bracket Replacement for Liftmaster Chamberlain Craftsman Garage Door Sensors, Sensor Beam Eyes Fit for Liftma
Check Price on Amazon- Universal Compatibility - 41A5034 Garage door sensor Works with ALL Liftmaster, Chamberlain, Sears, Craftsman garage door openers manufactured AFTER 1997; Direct replacement for G801CB-P, 261045, 41A5034-1, and other com
- 2026 Upgraded Version Sensing Response Speed - Working principle of the garage door replacement sensor is to stop closing the garage door after sensing an object. Therefore, the sensing speed of the sensor will become ve
- When do you need to replace our sensors - original sensor is damaged and no longer works, the sensing speed of the sensor slows down, the sensing performance of the sensor deteriorates after being stimulated by sunlight,
- Quick and tool free installation - The package comes with a detailed instruction manual. You can quickly complete the replacement according to the manual and accompanying accessories. Please note: During installation, pl
- BNRSZ brand plug and play garage door safety sensor will be continuously updated and upgraded - We will collect the reasons for user malfunctions and actual usage situations. Timely update and improve our garage door pho