
Garage Door Torsion Spring Winding Bars with Non-Slip Handle, D1/2'' x L17.2'', 1 Pair
- Functionality - Facilitates controlled winding and unwinding of tension within torsion springs.
- Specifications - Featuring a diameter of 1/2" and a length of 17.2", equipped with a anti-slip rubber.
- Composition - Constructed from durable high-strength 45# steel, with a galvanized finish enhancing both.
- Advantages - The anti-slip handle enhances safety by ensuring a secure grip during usage.

Garage Door Torsion Springs 2'' (Pair) with Non-Slip Winding Bars,High Quality Coated Torsion Springs with a Minimum of 18,000
- Replace Broken Springs:Use this pair of high quality garage door torsion springs to replace old broken.
- High Quality:Made of heat-treated steel coils with upgraded aluminum cones.Surface is blacked and oil.
- Service Life:For use on doors 7' or 8' high doors with 4" standard lift drums. Engineered for maximum.
- Easy to Install:We also offer a pair of winding bars,they will help install new or replace old, rusty.
Garage Door Torsion Springs 2'' (Pair) with Non-Slip Winding Bars, Coated Torsion Springs with a Minimum of 18,000 Cycles
- Replace Broken Springs:Use this pair of high quality garage door torsion springs to replace old broken.
- High Quality:Made of heat-treated steel coils with upgraded aluminum cones.Surface is blacked and oil.
- Service Life:For use on doors 7' or 8' high doors with 4" standard lift drums. Engineered for maximum.
- Easy to Install:We also offer a pair of winding bars,they will help install new or replace old, rusty.
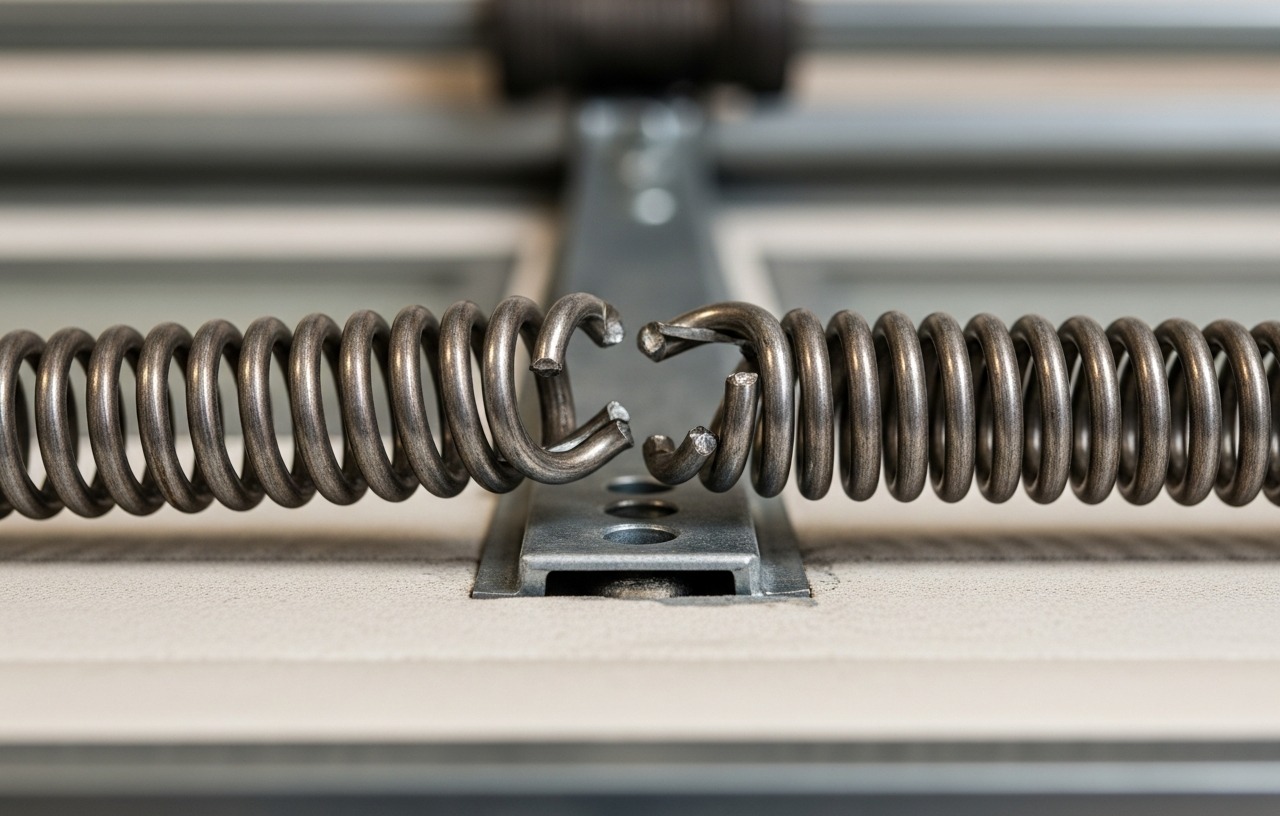
A loud, sudden bang from the garage often signals a broken torsion spring. This critical component balances the heavy weight of your garage door, allowing it to open and close smoothly. Without it, the door becomes dangerously heavy and will not operate correctly, if at all.
Replacing a garage door torsion spring is a challenging but achievable DIY project. This guide details the steps to replace your garage door torsion springs without needing to remove the entire torsion tube assembly, making the process more manageable for homeowners.
Understanding the Risks: Safety First
Garage door torsion springs are under extreme tension. They store immense energy. Improper handling can cause serious injury or even death. Always prioritize safety. Never attempt this repair without the proper tools and a clear understanding of each step. If you feel uncomfortable at any point, stop and call a professional technician.
When to Call a Professional
While many homeowners can tackle this repair, some situations warrant professional help:
- Very heavy or oversized doors: Commercial doors or unusually large residential doors often have heavier springs requiring specialized equipment.
- Multiple broken springs: If more than two springs are broken, or if the entire torsion assembly appears damaged.
- Lack of confidence: If you are unsure about any step or uncomfortable with the inherent risks, a professional is the safer choice.
- Damaged torsion tube or bearings: If the central shaft (torsion tube) is bent, rusted through, or the end bearing plates are severely damaged, more extensive repair is needed.
Tools and Materials Required
Gather all necessary items before you begin. This helps the process run smoothly and safely. Most parts are available at home improvement stores or online.
- Winding Bars: Two solid steel winding bars are essential. They must be 1/2-inch in diameter and at least 17 inches long. For controlled winding and unwinding, consider a product like the Garage Door Torsion Spring Winding Bars with Non-Slip Handle. These are constructed from durable high-strength 45# steel with a galvanized finish for durability. Expect to pay around $25-$40 for a pair.
- New Torsion Springs: You will need one or two new springs, depending on your door's configuration. It is recommended to replace both springs even if only one is broken, as the other is likely to fail soon. A good option is a set like the Pair of 2" Garage Door Torsion Springs Set with Non-Slip Winding Bars & Gloves, High Precision Electrophoresis Oil-Free Black. This set includes a pair of high quality torsion springs with a wire size of 0.243, 2-inch inside dimension, and varying lengths. A pair of springs costs between $70 and $150.
- C-Clamp or Locking Pliers: To secure the garage door.
- Adjustable Wrench or Socket Set: For nuts and bolts.
- Measuring Tape: For spring dimensions.
- Gloves: heavy duty work gloves for protection.
- Safety Glasses: Always protect your eyes.
- Ladder: A sturdy stepladder.
- Permanent Marker: To mark the winding cone.
- Vise Grips or Clamps: To hold the torsion tube in place.
- Hammer: To tap components.
- Drill with Hex Bit (optional): For faster removal of lag screws if applicable.
Choosing the Right Replacement Torsion Springs
Selecting the correct springs is critical for proper door balance and safe operation. Incorrect springs can lead to premature opener failure or a dangerously heavy door. The key measurements are wire size, inside diameter, and length.
- Measure Wire Size: Use a ruler or calipers to measure the length of 10 or 20 coils. Divide the total length by the number of coils to find the wire size. For example, if 20 coils measure 4.86 inches, the wire size is 0.243 inches. This must be precise.
- Measure Inside Diameter (ID): The inside diameter is usually 2 inches or 1.75 inches for residential doors. Measure the interior of the spring coils.
- Measure Length: Measure the spring's entire length in its unwound state.
- Determine Wind Direction: Torsion springs are either left-wound or right-wound. When standing inside the garage looking out, a right-wound spring has its winding cone on the left, and a left-wound spring has its winding cone on the right. The wire coils point upwards at the center of the spring.
Many homeowners find it easiest to buy a set designed for their door's height, such as springs for 7-foot or 8-foot high doors. The product description for the Pair of 2" Garage Door Torsion Springs Set with Non-Slip Winding Bars & Gloves, High Precision Electrophoresis Oil-Free Black specifies a 0.243 wire size x 2” inside dimension, which is a common residential size. Always double-check your measurements against the product specifications.
step by step Guide: Replacing Your Torsion Springs
This process takes approximately 2 to 4 hours for a diligent DIYer.
Step 1: Secure the Garage Door
Close the garage door completely. Unplug the garage door opener from the ceiling outlet. This prevents accidental operation. Use a sturdy C-clamp or a pair of locking pliers to secure the door to the track just above the bottom roller. This ensures the door cannot move up unexpectedly. For more troubleshooting tips, refer to our article on Garage Door Won't Open? 8 Causes and How to Fix Each One.
Step 2: Disconnect the Opener and Cables
Locate the emergency release handle on your garage door opener's trolley and pull it. This disconnects the door from the opener. Next, inspect the cable drums at each end of the torsion tube. The lift cables run from the bottom of the door, up over the pulleys, and connect to these drums. If the cables are still under tension, release them from the cable drums. This usually involves loosening a set screw or bolt. Be careful; if the spring is still partially wound, tension might remain.
Step 3: Loosen the Set Screws on the Broken Spring
Identify the broken spring. It will likely be noticeably separated or unwound. At the center of the torsion tube, where the spring meets the stationary center bracket, you will find two set screws on the winding cone. Use your adjustable wrench or socket to loosen these screws. Do not remove them entirely yet. The broken spring will immediately release any residual tension.
Step 4: Unwind the Unbroken Spring (If Applicable)
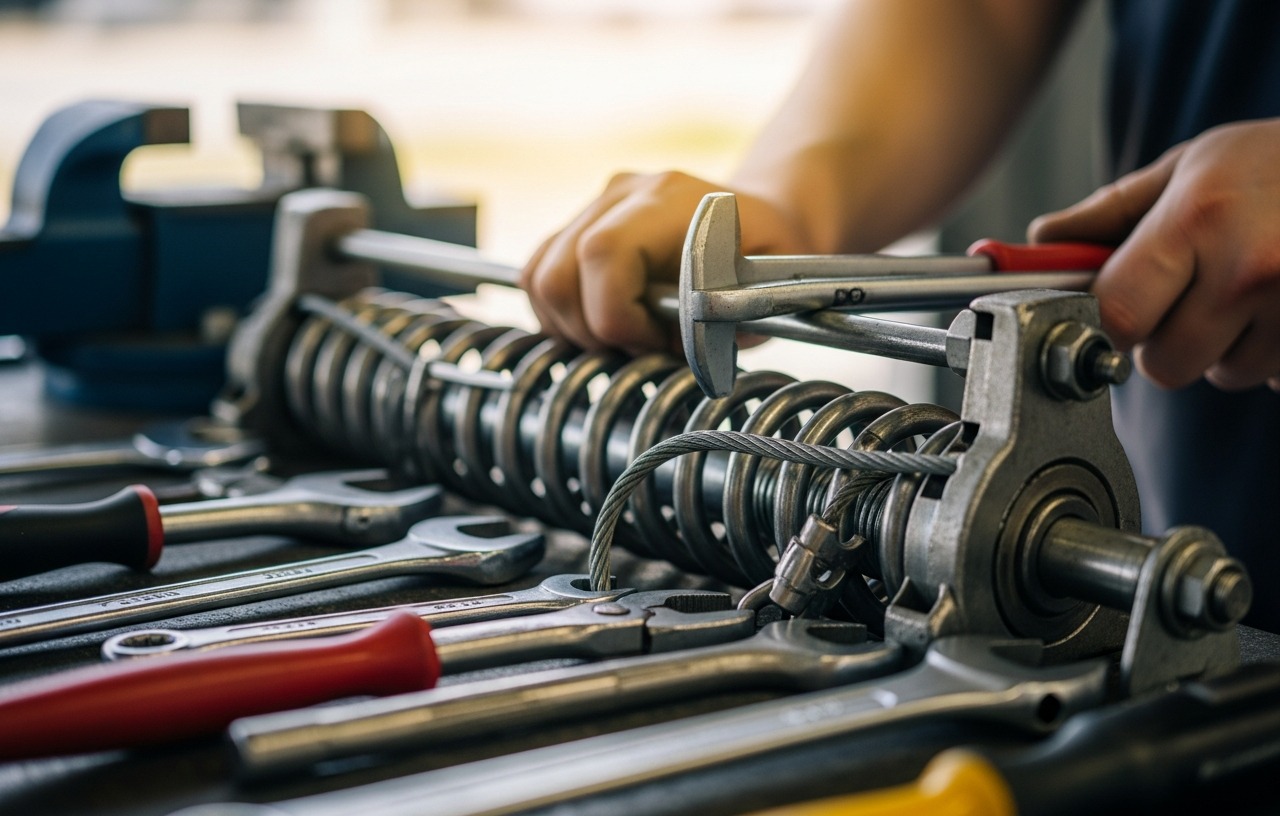
If you have two springs and only one is broken, you must safely unwind the unbroken spring. Place one winding bar into the bottom hole of the winding cone. Hold it firmly. Place the second winding bar into the hole above it. Use the second bar to turn the winding cone a quarter turn counter-clockwise. Insert the first bar into the next hole and remove the second bar. Repeat this process, unwinding the spring one quarter turn at a time, until all tension is released. Most residential springs require 7 to 8 full turns (28 to 32 quarter turns). Mark each full turn with a marker to keep track. Once unwound, loosen the two set screws on this spring's winding cone.
Step 5: Remove the Old Springs and Center Bearing
With all springs unwound and set screws loosened, slide the springs away from the center bracket. You may need to tap them with a hammer. Remove the lag screws holding the center bearing plate to the header. Carefully slide the entire torsion tube, with the old springs still attached, away from the end bearing plates. Take off the old springs. The center bearing will also need to be replaced, as it wears down over time. It is a small, often plastic or metal component that helps the torsion tube rotate smoothly.
Step 6: Install New Center Bearing and Springs
Slide the new center bearing onto the torsion tube first. Then, install the new springs. The winding cones face the center bracket, and the stationary cones face the end bearing plates. Ensure the left-wound spring is on the left side and the right-wound spring is on the right side when viewing from inside the garage. The winding bars included with the Pair of 2" Garage Door Torsion Springs Set with Non-Slip Winding Bars & Gloves will be useful for the next steps. Reattach the center bearing plate to the header with the lag screws.
Step 7: Wind the New Torsion Springs
This is the most critical and dangerous step. Make sure your safety glasses and gloves are on. Connect the lift cables to the cable drums at each end of the torsion tube. Secure the drums to the torsion tube with set screws. Insert a winding bar into the bottom hole of the winding cone. Hold it firmly. Insert the second winding bar into the hole above the first. Rotate the winding cone upwards, applying tension. Wind the spring the same number of turns you counted during unwinding (typically 7.5 to 8.5 full turns). After each full turn, tighten the set screws on the winding cone to hold the tension. Once fully wound, tighten the set screws very firmly. Repeat for the second spring. Remove the winding bars carefully.
Step 8: Test the Door and Make Adjustments
Remove the C-clamp or locking pliers from the garage door track. Reconnect the garage door opener by pulling the emergency release handle towards the opener until it clicks into place. Plug the opener back in. Slowly lift the door by hand. It should feel balanced, staying open at any point without effort. If it falls, add more tension (quarter turns) to both springs. If it flies up quickly, release some tension. Make small, even adjustments to both springs until the door is balanced. For more detailed information on spring issues, read Broken Garage Door Spring: What to Do Right Now (And What Not To).
Cost Breakdown: DIY vs. This reduces friction and rust.
Garage Door Torsion Spring Winding Bars with Non-Slip Handle, D1/2'' x L17.2'', 1 Pair
- Functionality - Facilitates controlled winding and unwinding of tension within torsion springs.
- Specifications - Featuring a diameter of 1/2" and a length of 17.2", equipped with a anti-slip rubber.
- Composition - Constructed from durable high-strength 45# steel, with a galvanized finish enhancing both.
- Advantages - The anti-slip handle enhances safety by ensuring a secure grip during usage.
Garage Door Torsion Springs 2'' (Pair) with Non-Slip Winding Bars,High Quality Coated Torsion Springs with a Minimum of 18,000
- Replace Broken Springs:Use this pair of high quality garage door torsion springs to replace old broken.
- High Quality:Made of heat-treated steel coils with upgraded aluminum cones.Surface is blacked and oil.
- Service Life:For use on doors 7' or 8' high doors with 4" standard lift drums. Engineered for maximum.
- Easy to Install:We also offer a pair of winding bars,they will help install new or replace old, rusty.
Garage Door Torsion Springs 2'' (Pair) with Non-Slip Winding Bars, Coated Torsion Springs with a Minimum of 18,000 Cycles
- Replace Broken Springs:Use this pair of high quality garage door torsion springs to replace old broken.
- High Quality:Made of heat-treated steel coils with upgraded aluminum cones.Surface is blacked and oil.
- Service Life:For use on doors 7' or 8' high doors with 4" standard lift drums. Engineered for maximum.
- Easy to Install:We also offer a pair of winding bars,they will help install new or replace old, rusty.