
Jin&Bao Universal Garage Door Threshold Seal Strip 20FT Kit, Bottom Waterproof Rubber Weather Stripping Replacement(Blue, 2
- Keep Garage Clean and Dry: The Jin&Bao garage door weatherproofing universal sealing strip, similar to a.
- Outstanding Durability: Specifically designed to withstand extreme temperature exposures. Stays perfect.
- Do-It-Yourself Installation: Quick and easy to install, you could cut this strip to adapt if your floor.
- Reliable Customer Support:We are always here to help. If you have any questions or need assistance at any.

DGSL Garage Door Seals Bottom Rubber Weather Stripping Kit Seal Strip Replacement, Weatherproof Threshold Buffering Sealing
- Heavy duty weatherproofing solution featuring a 5/16 inches T-Channel Ends design and 3 3/4 inches width.
- Made with flexible waterproof rubber. Long-lasting material, could work for a long time. Maintains optimal.
- This garage door seal kit installs effortlessly without any screws or nails, making it a quick and easy.
- Dual rubber design reduces noise by up to 5 times. The Garage door weatherproofing universal sealing strip.

Jin&Bao Universal Garage Door Threshold Seal Strip 20FT Kit, Bottom Waterproof Rubber Weather Stripping Replacement(Black, 2
- Keep Garage Clean and Dry: The Jin&Bao Garage door weatherproofing universal sealing strip can keeps.
- Outstanding Durability: Specifically designed to withstand extreme temperature exposures. Stays perfect.
- Safe and Durable Design: The Garage door seal made of high quality flexible rubber material, featuring.
- Do-It-Yourself Installation: Our Garage Door Bottom Seal can be easily and quickly installed. Its total.
A cold draft sweeping under your garage door, even when closed, often points to a worn or damaged bottom seal. This small but vital component creates a barrier between the garage door and the floor. When it fails, your garage becomes vulnerable to outside elements. Replacing it is a DIY project that can significantly improve your home's energy efficiency and comfort.
Many homeowners can complete this task in an afternoon with basic tools. Understanding the different seal types and how to measure correctly prevents frustration. This guide covers everything from selecting the right material to a step by step installation process.
Why Replace Your Garage Door Bottom Seal?
A functional garage door bottom seal serves several important purposes. Its primary job is to create a tight seal against the garage floor when the door is closed. This seal prevents drafts, keeping your garage warmer in winter and cooler in summer. This directly translates to lower energy bills for conditioned spaces adjacent to or within the garage.
Beyond temperature regulation, a good seal acts as a barrier against water, leaves, dust, and debris. It also deters pests, such as rodents and insects, from entering your garage. A cracked, brittle, or torn seal compromises all these functions. You might notice standing water after rain, an increase in insects, or higher heating and cooling costs. Regular inspection of your bottom seal can help catch wear early. Look for signs of flattening, cracking, or missing sections.
Understanding Garage Door Bottom Seal Types
Garage door bottom seals come in various profiles and materials. Choosing the correct type for your door's retainer is essential for a proper fit and effective seal. The profile of the seal must match the profile of the retainer.
- T-Style (or T-End) Seals: These are very common. They have one or two 'T' shaped ends that slide into corresponding grooves in the retainer. They are available in various widths and bulb shapes (e.g., 'bulb,' 'L,' 'U') below the 'T' to create the seal.
- Bulb Seals: Often found on older doors or specific commercial doors, these seals have a rounded bulb shape that slides into a circular or semi-circular channel.
- P-Style Seals: Less common, these have a 'P' shape that slides into a specific retainer.
The DGSL Garage Door Seals Bottom Rubber Weather Stripping Kit is an example of a T-channel end design. It features a 5/16-inch T-channel end, making it compatible with many standard aluminum retainers. This heavy duty weatherproofing solution is made with flexible, waterproof rubber, designed for long-lasting performance. Its material maintains optimal sealing capabilities even after extensive use, providing a reliable barrier against the elements.
Threshold Seals for Garage Floors
Threshold seals are different. They do not attach to the door itself. Instead, they are glued to the garage floor directly under where the garage door closes. These seals create a raised barrier that the bottom of the door presses against when closed. They are excellent for uneven floors or when the existing door-mounted seal is insufficient. They also prevent water from flowing under the door.
The Jin&Bao Universal Garage Door Threshold Seal Strip 20FT Kit, available in blue or black, is a popular choice for floor-mounted applications. It is designed to keep your garage clean and dry by creating a robust waterproof barrier. Researched from user reviews, this strip offers outstanding durability and is specifically designed to withstand extreme temperature exposures. Its high quality flexible rubber material ensures a safe and lasting design. Installation is typically a do-it-yourself project, requiring adhesive to secure it to the floor.
Seal Materials
The material of the seal impacts its durability and effectiveness. Common materials include:
- Vinyl: A cost effective option, but it can become stiff and crack in extreme temperatures.
- Rubber (EPDM): More durable and flexible than vinyl, EPDM rubber withstands a wider range of temperatures and offers better longevity. Many high quality seals, like the DGSL and Jin&Bao options, use durable rubber compounds.
Measuring for the Right Size
Accurate measurements are vital for selecting the correct replacement seal. Incorrect measurements lead to gaps or an inability to install the new seal.
- Measure the Door Width: Use a tape measure to determine the total width of your garage door. Purchase a seal that is at least as long as your door's width. Many seals come in standard lengths (e.g., 9 feet, 16 feet, 20 feet) and can be cut to fit.
- Determine the Seal Profile: If replacing a seal that slides into a retainer, you must identify the existing seal's profile. Carefully slide a small section of the old seal out of the retainer. Examine the shape of the part that slides into the channel. Is it a single 'T,' a double 'T,' a 'bulb,' or something else? Measure the width of the 'T' section (the part that inserts into the channel). Common T-widths are 1/4 inch or 5/16 inch.
- Measure the Retainer Channel: If your old seal is completely gone, measure the width of the groove inside the aluminum retainer at the bottom of the door. This measurement helps confirm the 'T' width needed.
- Measure the Seal's Coverage: For door-mounted seals, measure the overall width of the existing seal from where it exits the retainer to its lowest point. This gives you an idea of how much coverage you need to bridge the gap to the floor.
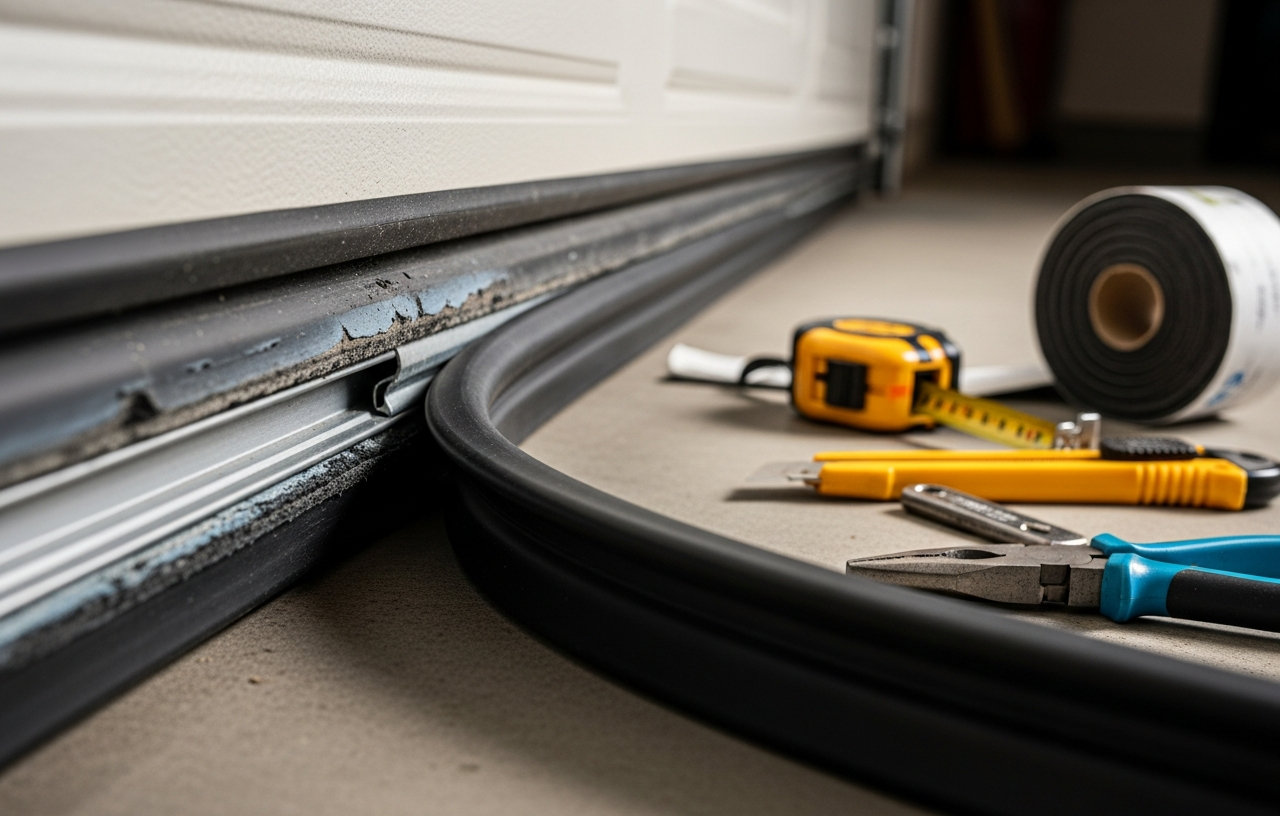
Tools and Materials Needed
Gather these items before you begin:
- Replacement garage door bottom seal (correct type and length)
- heavy duty utility knife or sharp scissors
- Measuring tape
- Pliers (optional, for removing old seal)
- Gloves
- Safety glasses
- Screwdriver or socket wrench (if retainer needs removal)
- Mild household cleaner and rags
- Silicone spray lubricant (e.g., WD-40 Specialist Silicone Lubricant)
- Adhesive (for threshold seals, usually not included)
Safety First
Working on a garage door requires caution. Always disconnect power to the garage door opener before starting any work. This prevents accidental activation of the door. If your door has extension or torsion springs, be aware they are under extreme tension. Do not attempt to repair or adjust springs yourself. If you suspect spring issues, contact a professional. If the door feels unusually heavy or does not stay open when manually raised, it could indicate a spring problem. You can learn more about this by reading Broken Garage Door Spring: What to Do Right Now (And What Not To).
step by step Garage Door Bottom Seal Replacement
The total time for this project typically ranges from 1 to 2 hours, depending on your door's size and the condition of the old seal.
Step 1: Prepare the Garage Door
Raise the garage door to a comfortable working height, usually waist-level or slightly higher. This makes the bottom retainer accessible. Unplug the garage door opener from the electrical outlet. If your garage door opener has a battery backup, disconnect the battery as well. Use C-clamps or vice grips to secure the door to the track just above the rollers. This prevents the door from accidentally closing while you work underneath it.
Step 2: Remove the Old Seal
Locate the ends of the bottom retainer. Many retainers have a small crimp or screw at each end to prevent the seal from sliding out. Remove any screws or pry open the crimped ends with pliers. Once the ends are clear, grasp the old seal firmly and pull it out of the channel. This might require some force, especially if the seal is brittle or stuck. If it resists, you can try cutting the seal into smaller, more manageable sections with a utility knife and pulling each piece out.
Step 3: Clean the Retainer Channel
With the old seal removed, the retainer channel might contain dirt, debris, or old lubricant residue. Use a stiff brush or a rag and a mild household cleaner to thoroughly clean the channel. Remove any rust with steel wool or a wire brush, if necessary. A clean channel makes installing the new seal much easier and helps it slide smoothly. Make sure the channel is dry before proceeding.
Step 4: Install the New Seal
This step often requires two people for longer doors. Apply a silicone spray lubricant generously into the clean retainer channel. This significantly reduces friction and allows the new seal to slide in easily. Starting from one end, carefully feed one 'T' side of the new seal into the channel. Once a few inches are in, feed the second 'T' side. Then, slowly pull the seal through the entire length of the retainer. Have a second person guide the seal into the channel from the other end and keep it straight. Avoid twisting or kinking the seal. If you are installing a threshold seal, follow the manufacturer's specific adhesive instructions. This usually involves cleaning the floor, applying adhesive, and pressing the seal firmly into place.
Step 5: Trim and Secure
Once the new seal is fully inserted and centered, use a utility knife or sharp scissors to trim any excess material from the ends. Leave a small amount of overhang (about 1/2 inch) if your retainer allows, then crimp the ends of the retainer with pliers or reinsert the screws you removed earlier. This prevents the new seal from shifting or sliding out over time. For threshold seals, make sure the adhesive has fully cured before operating the door, following the product's recommended drying time.
Step 6: Test and Adjust
Remove the C-clamps and reconnect power to the garage door opener. Slowly lower the garage door. Observe how the new seal compresses against the floor. There should be a consistent, tight seal across the entire width of the door. If you notice any gaps or uneven compression, you might need to adjust the door's down-travel limit settings on your opener. Consult your opener's manual for specific instructions on adjusting these limits. Sometimes, installing a new, thicker seal can cause the safety sensors to misalign. If your door reverses unexpectedly or the sensors blink, refer to How to Align Garage Door Sensors in 5 Minutes (No Tools Needed) for guidance.
Product Recommendations
Choosing the right product makes the replacement process simpler and the results more effective.
For Door-Mounted T-Channel Seals:
The DGSL Garage Door Seals Bottom Rubber Weather Stripping Kit Seal Strip Replacement is an excellent choice for homeowners needing a durable, flexible rubber seal that slides into a T-channel retainer. Its 5/16-inch T-channel ends ensure compatibility with many standard garage door bottom retainers. The material is designed for long-lasting use, providing a strong barrier against the elements. Based on product specs, it offers a robust solution for weatherproofing your garage door.
For Floor-Mounted Threshold Seals:
If you prefer a threshold seal that adheres to the garage floor, consider the Jin&Bao Universal Garage Door Threshold Seal Strip 20FT Kit. It is available in both blue and black options, allowing for a choice in aesthetics. They are effective at keeping water, dust, and pests out, making them a good option for improving your garage's cleanliness and dryness. Installation is a DIY friendly process, allowing you to cut the strip to fit your garage door's width.
When to Call a Professional
While replacing a garage door bottom seal is a common DIY task, certain situations might warrant professional assistance. If your garage door is exceptionally heavy, or if you suspect issues with the door's balance or springs, a professional technician can diagnose and fix these problems safely. If the retainer itself is damaged or corroded beyond repair, replacing the entire bottom section of the door or installing a new retainer might be necessary. This can be a more complex job. For a full breakdown of potential costs, see Garage Door Replacement Cost: Full Breakdown for 2026.
Replacing your garage door bottom seal is a relatively simple home improvement project. It offers significant returns in terms of energy savings, pest control, and overall garage protection. By carefully choosing the right type of seal and following these steps, you can restore your garage door's protective barrier and improve your home's comfort.
Jin&Bao Universal Garage Door Threshold Seal Strip 20FT Kit, Bottom Waterproof Rubber Weather Stripping Replacement(Blue, 2
- Keep Garage Clean and Dry: The Jin&Bao garage door weatherproofing universal sealing strip, similar to a.
- Outstanding Durability: Specifically designed to withstand extreme temperature exposures. Stays perfect.
- Do-It-Yourself Installation: Quick and easy to install, you could cut this strip to adapt if your floor.
- Reliable Customer Support:We are always here to help. If you have any questions or need assistance at any.
DGSL Garage Door Seals Bottom Rubber Weather Stripping Kit Seal Strip Replacement, Weatherproof Threshold Buffering Sealing
- Heavy duty weatherproofing solution featuring a 5/16 inches T-Channel Ends design and 3 3/4 inches width.
- Made with flexible waterproof rubber. Long-lasting material, could work for a long time. Maintains optimal.
- This garage door seal kit installs effortlessly without any screws or nails, making it a quick and easy.
- Dual rubber design reduces noise by up to 5 times. The Garage door weatherproofing universal sealing strip.
Jin&Bao Universal Garage Door Threshold Seal Strip 20FT Kit, Bottom Waterproof Rubber Weather Stripping Replacement(Black, 2
- Keep Garage Clean and Dry: The Jin&Bao Garage door weatherproofing universal sealing strip can keeps.
- Outstanding Durability: Specifically designed to withstand extreme temperature exposures. Stays perfect.
- Safe and Durable Design: The Garage door seal made of high quality flexible rubber material, featuring.
- Do-It-Yourself Installation: Our Garage Door Bottom Seal can be easily and quickly installed. Its total.